Hunting for XSS
XSS / Cross-site scripting (which is just another form of Code Injection) can be a severe vulnerability.
It's also very common.
That potent combination - profitability and ubiquity - marks it as a worthy target for penetration testers interested in public bounties.But because of a high rate of false-positives (and inevitably imperfect detection logic) the process of ferreting out XSS comes with a lot of noise. The XSS Validator from Nvisium is designed to solve this problem. It verifies XSS findings exported from the Burp Suite interface in a Phantomjs server designed to receive, analyze, and validate possible XSS snippets. The extension is critical for testing a target with a large attack surface.
Installing XSS Validator
The easiest way to download the XSS Validator plugin is to install it via the Bapp Store - Burp's version of Google Play or the Apple App Store - by navigating to the “Extender” tab and then the “Bapp Store” submenu. Simply click the “Install” button and let Bapp do its thing.
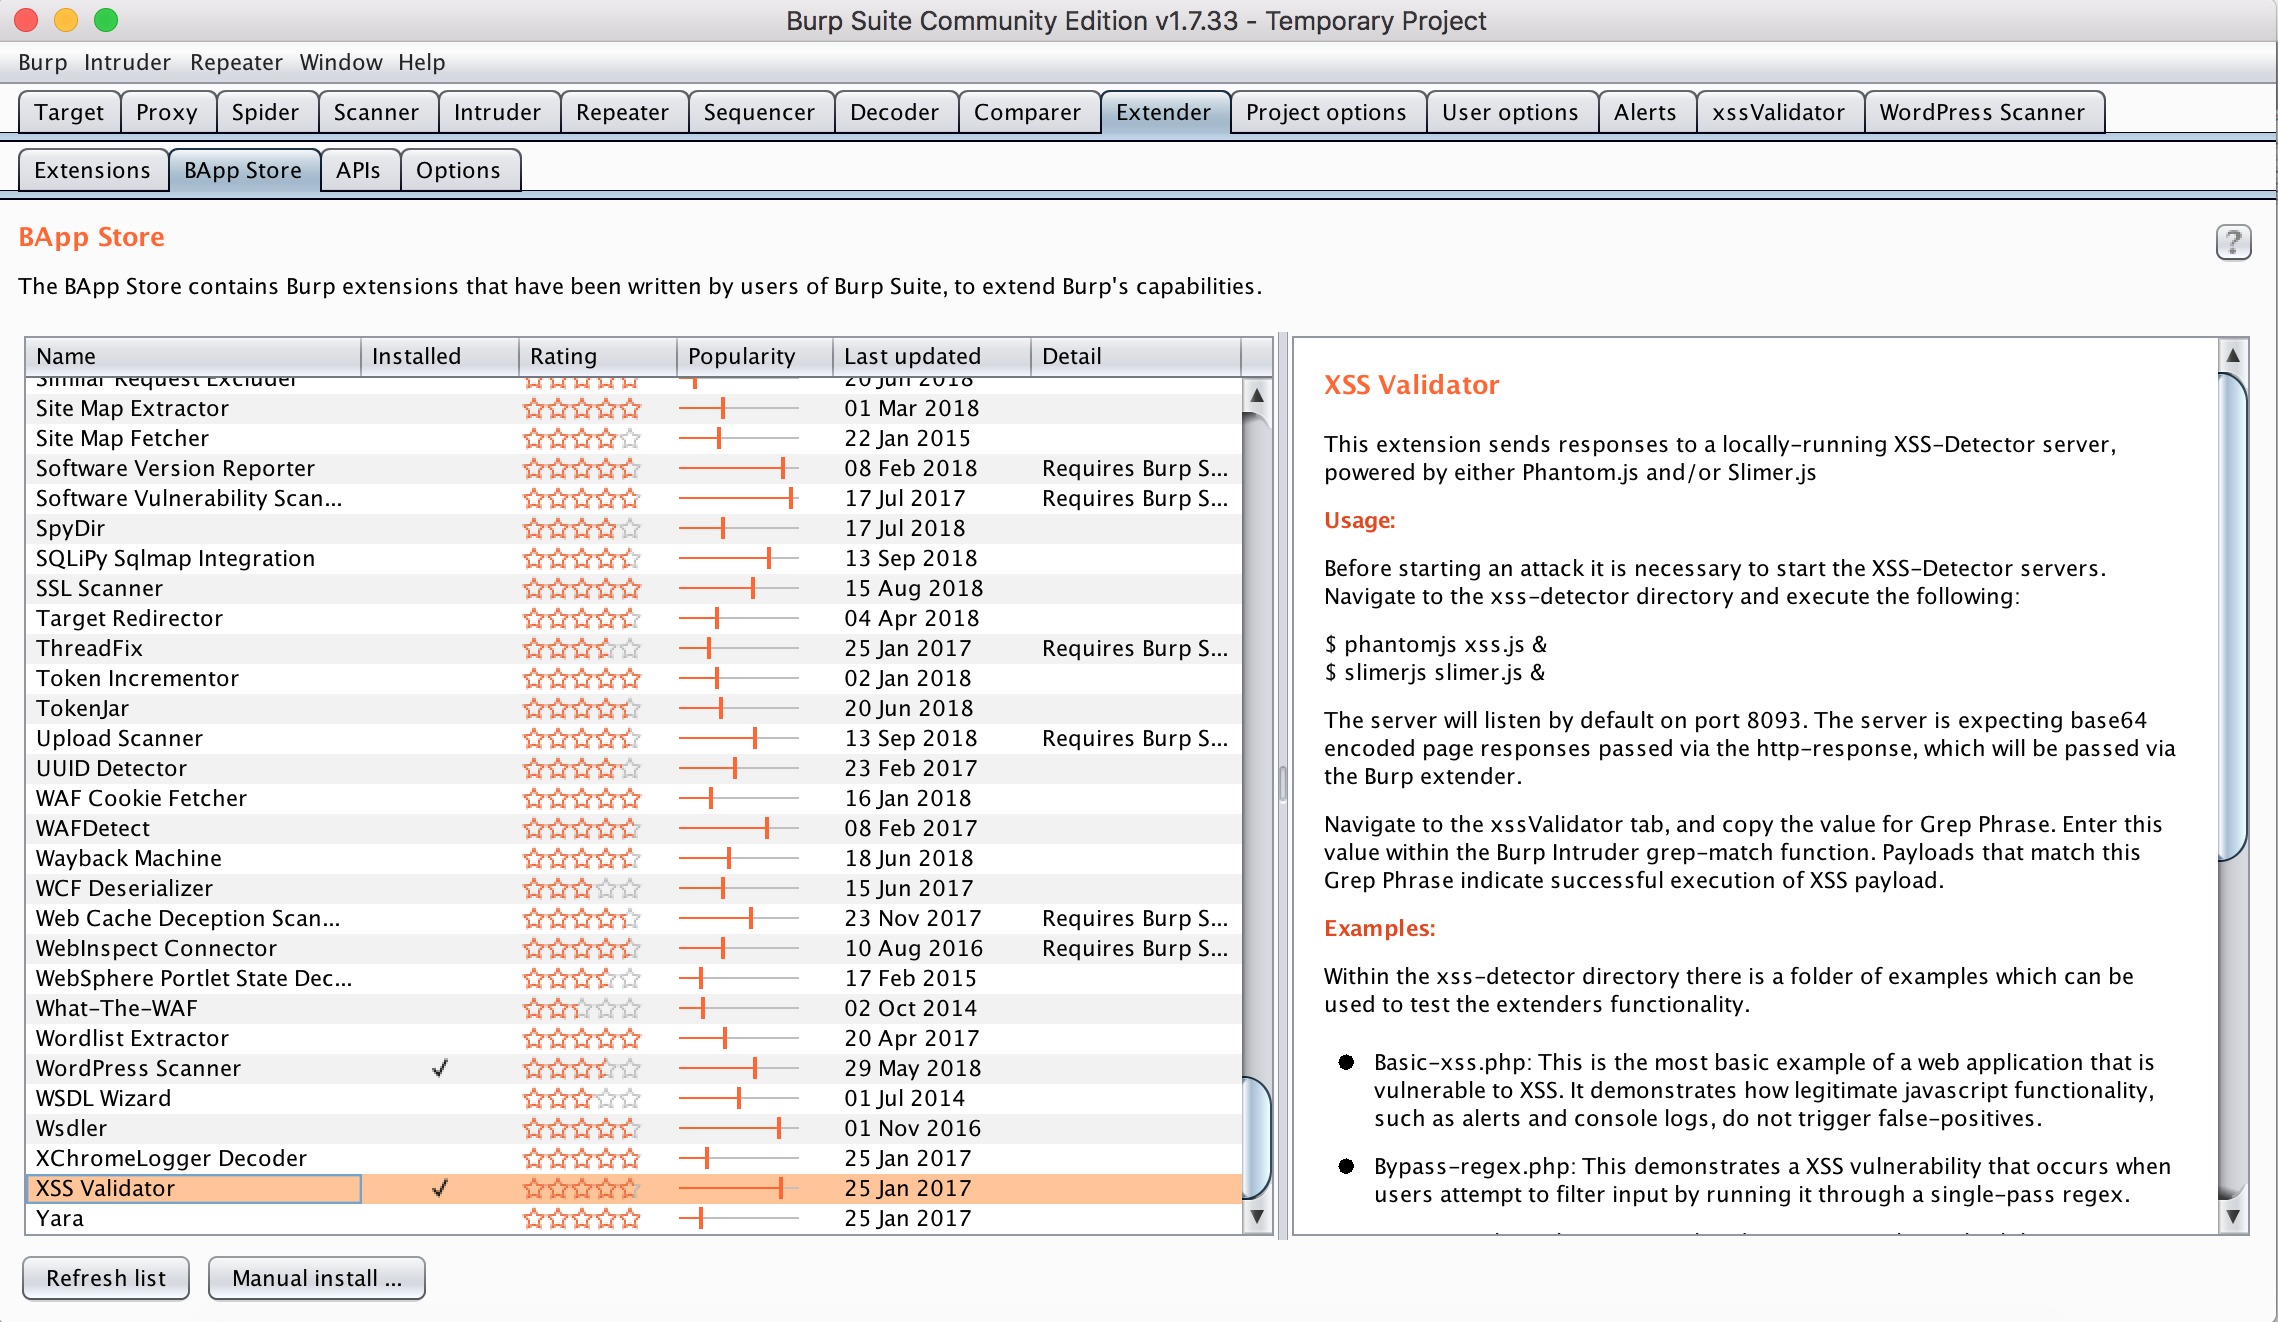
If you're having an issue installing straight from the store, you can also perform a manual install by downloading the extension's jar file from either its Github and selecting it from the “Manual Install” file uploader.
Whichever way you install the Burp Extension, you'll also need to setup the Phantomjs server locally so that it can receive and parse incoming XSS tests. To do this, clone the Github repo, navigate to the xss-validator directory and bootstrap the server with phantomjs xss.js & (The & sets the command as a background process. If you don't have Phantomjs already installed, you can make it a globally-available Node package with npm install -g phantomjs). You should see the server listening, ready for incoming requests.
Configuration and Execution
With the extension installed and the server running, there's only a little bit of configuration left before you can run and complete your first scan.
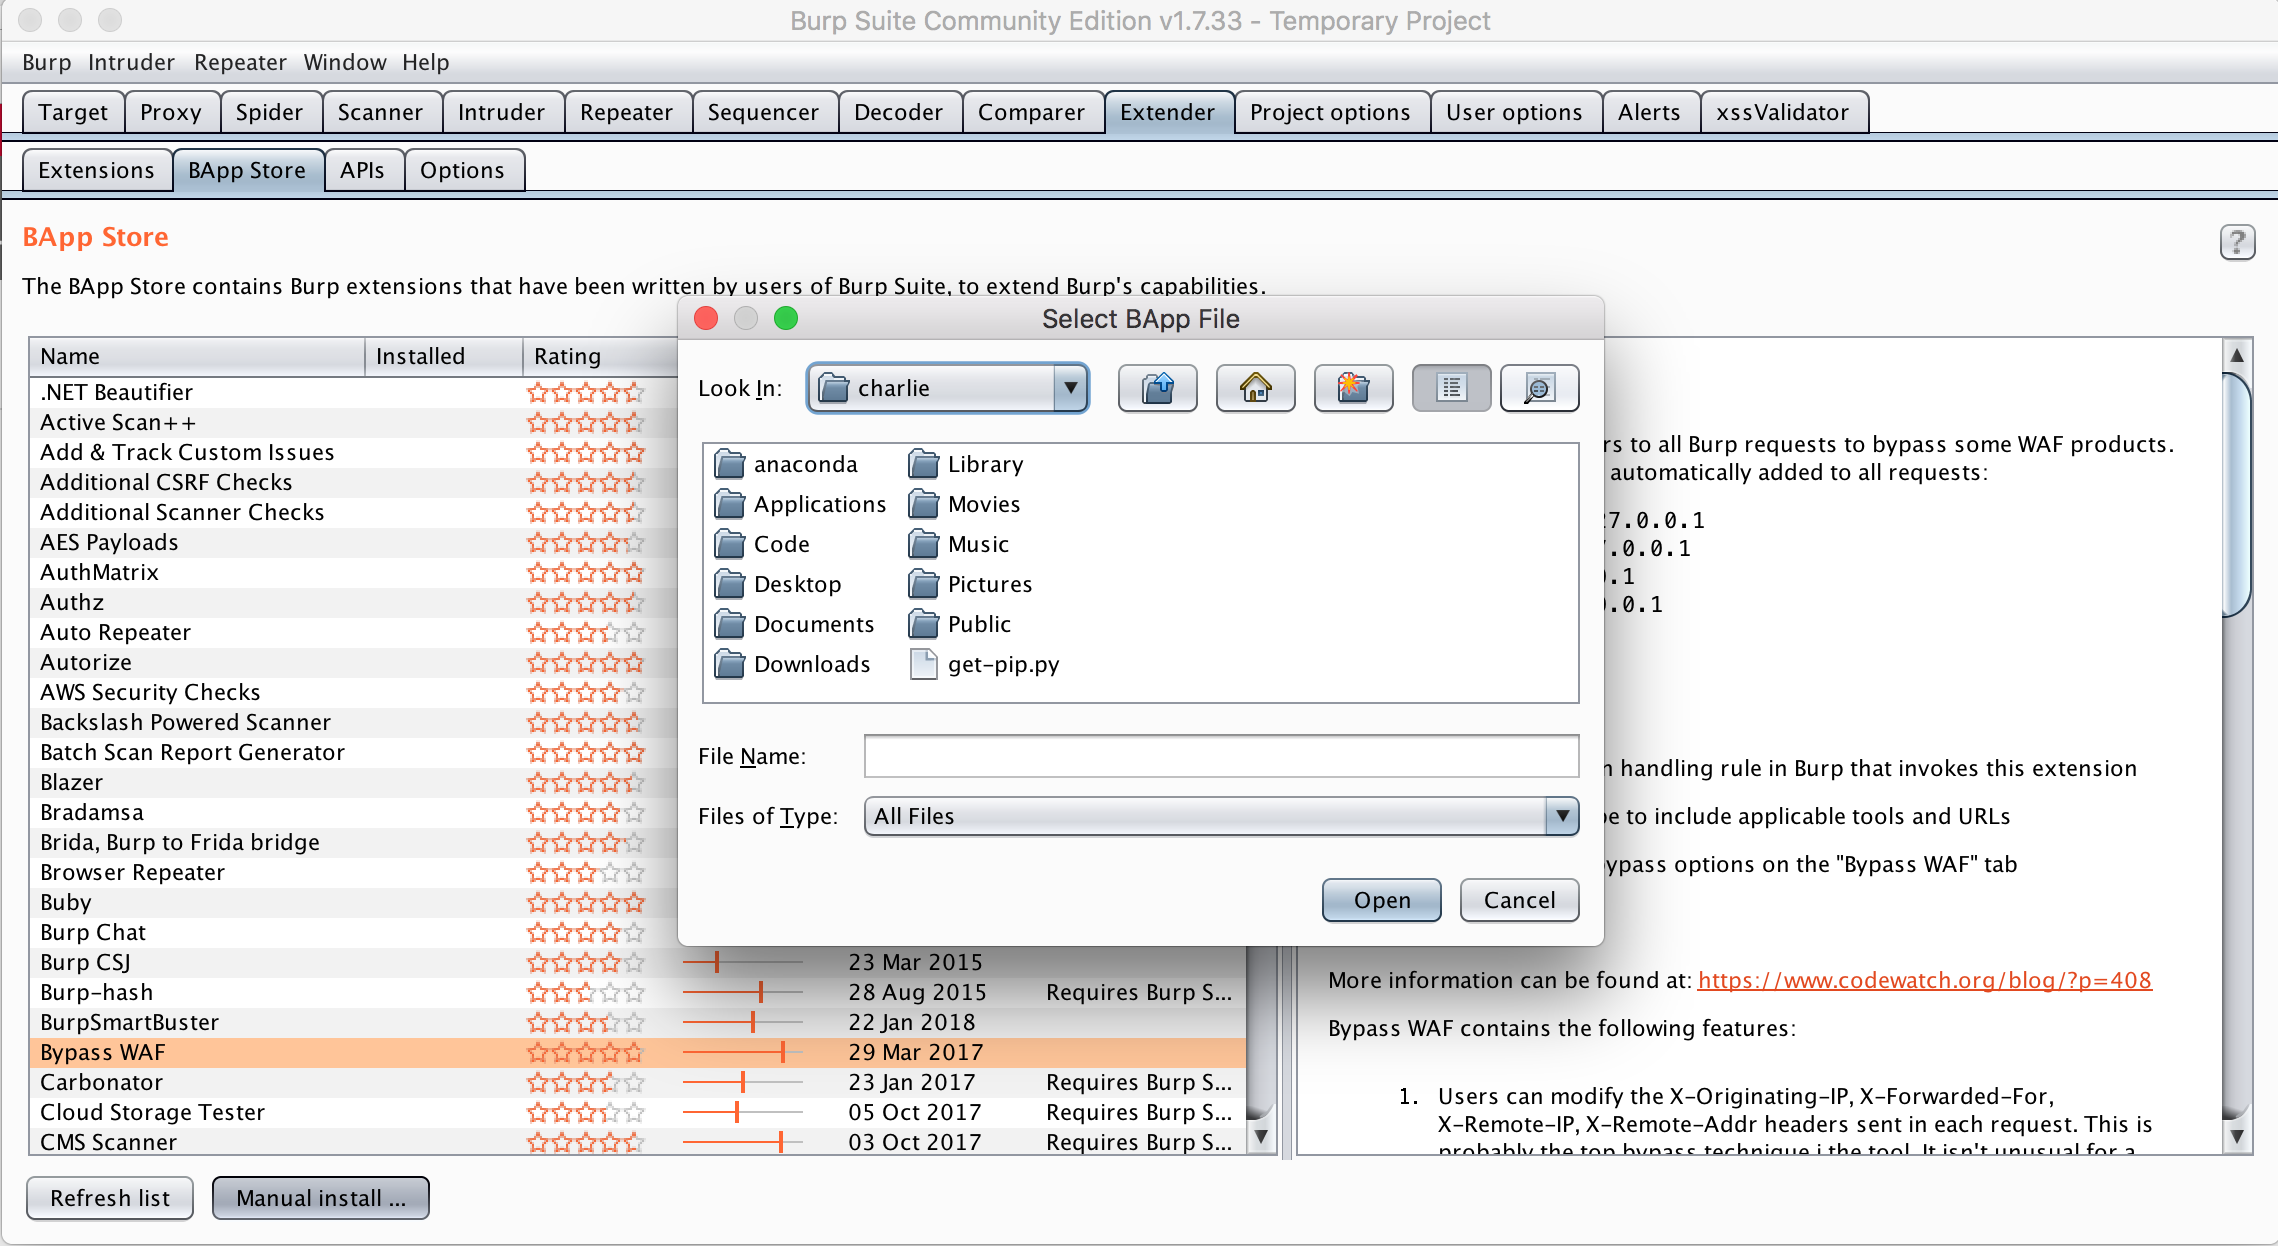
When you've selected a target, intercepting the form fields that you'd like to test via Burp Proxy, send them to Burp Intruder and select the inputs you'd like to test your XSS payloads against. Also, in order to integrate with the XSS Validator extension, we need to make changes to the first three payload-related settings.
Payload Sets For the second dropdown, “Payload type,” select the “Extension-generated” option.
Payload Options When you click “Select generator” you'll open a modal where you can select “XSS Validator Payloads” as your “selected generator”
Then you can navigate to the XSS Validator extension tab.

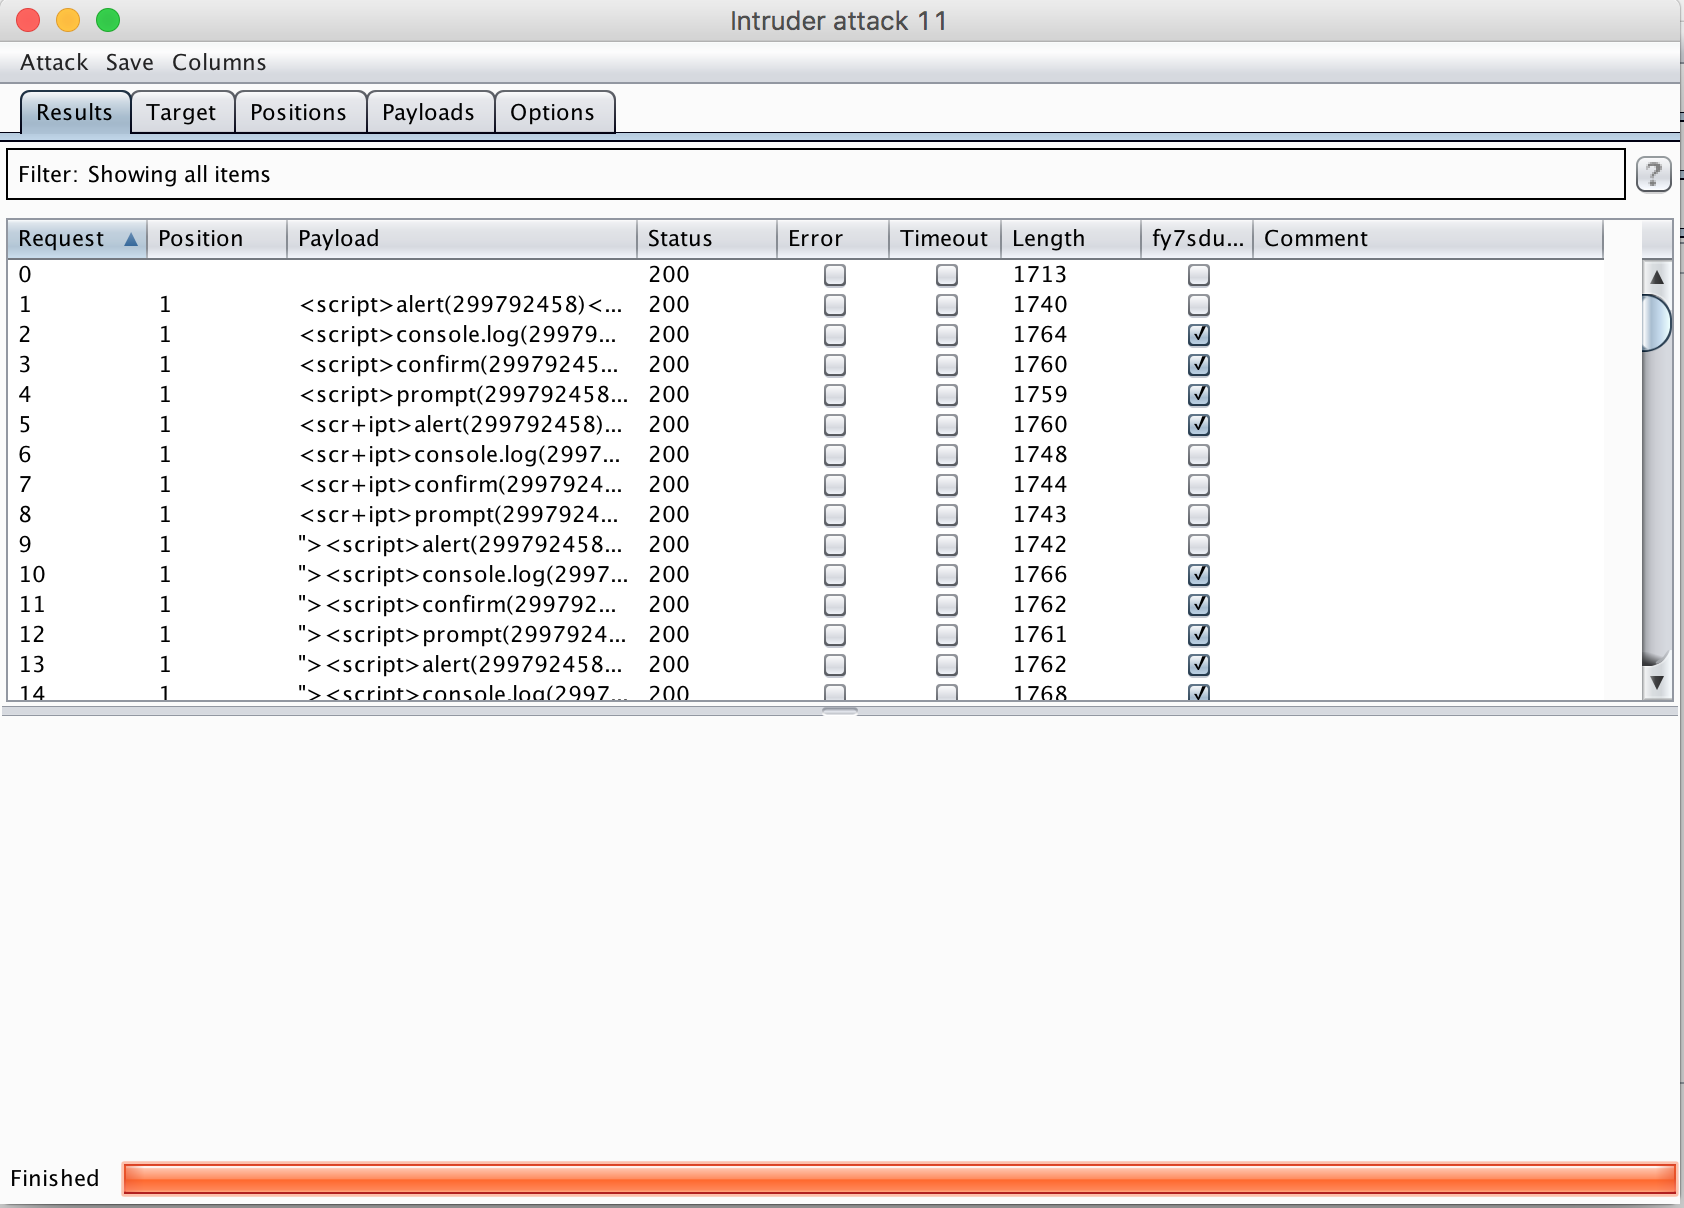
You'll want to note the grep phrase - this is the string XSS Validator injects and scans for later to confirm the presence of an unsanitized input. You'll want to take this string and enter it into the Grep - Match section of the Intruder tab, so that you can easily see where this phrase appears in the results of your scan.

Now you're ready to run the scan. Here's the results of our (successful) scan of webscantest.com!
Conclusion
Hopefully this short tutorial has been enough to get you up and playing with a valuable Burp Extension. If you're interested in diving further into Burp and penetration testing (or Burp Extensions specifically) check out Hands-On Bug Hunting for Penetration Testers.
Happy Hunting.